Crystal Pro CP10K Pods: How to Use Them Correctly
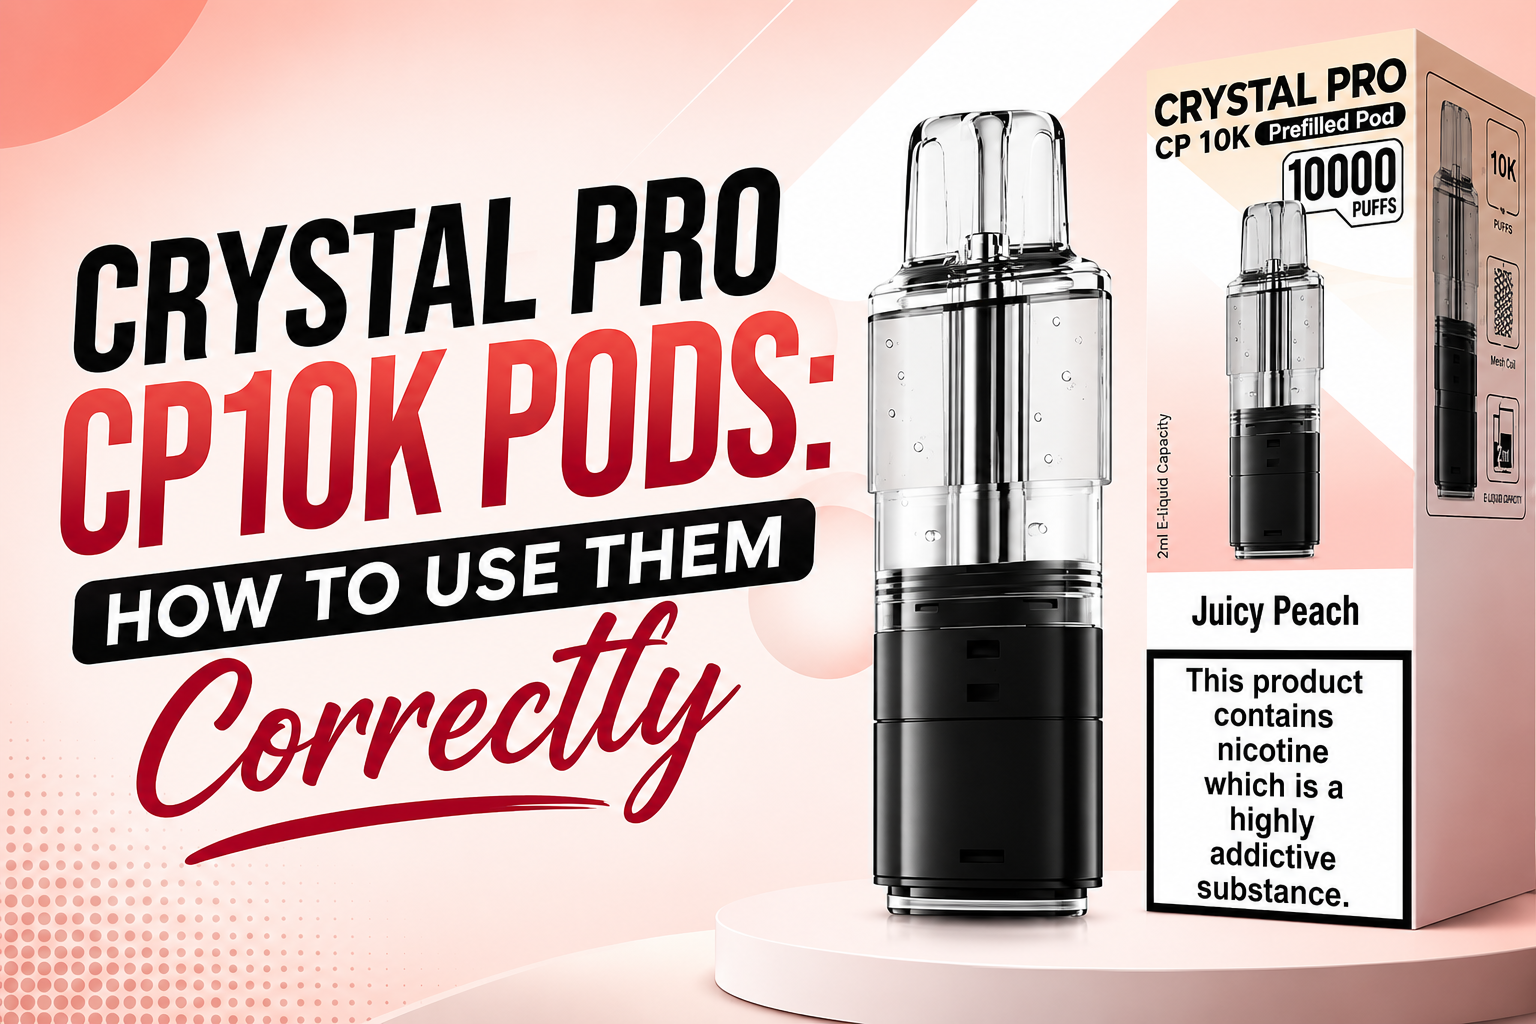
Crystal Pro CP10K Pods are designed to work with the Crystal Pro CP10K pod system. If you are using the device for the first time or changing an old pod, it is important to fit the replacement correctly.
Knowing how to use Crystal Pro CP10K pods can help you avoid simple problems such as a loose connection, poor vapour production or a pod that does not work properly. This guide explains the correct pod setup, installation, replacement and basic care in simple steps.
What Are Crystal Pro CP10K Pods?
Crystal Pro CP10K pods are prefilled pods made for the compatible Crystal Pro CP10K device. These replacement pods are designed as part of a dedicated pod system, so using the correct pod is important for proper performance.
Depending on the product version, the pod system may include a prefilled pod and an integrated refill supply. This means the setup is different from a standard open pod that you fill manually.
Crystal Pro CP10K replacement pods are designed for their compatible device and should not be treated as universal vape pods. Always check device compatibility before fitting a new pod.
Before Using Crystal Pro CP10K Pods
Before using the pod, take a few minutes to check everything properly. Good preparation can make the pod installation process easier.
Follow these basic checks:
-
Remove the packaging carefully.
-
Check the pod carefully for any visible damage.
-
Inspect the pod before use.
-
Remove any protective seals, stickers or silicone covers.
-
Check that the connection area is clean.
-
Make sure the pod is designed for your compatible device.
-
Follow the product instructions supplied with your device.
Using the correct replacement pod is important. Crystal Pro CP10K compatible pods should match the Crystal Pro CP10K pod system correctly. Do not force other replacement pods into the device.
How to Use Crystal Pro CP10K Pods for the First Time
If you are wondering how to use CP10K pods for the first time, the process is usually simple.
Step 1: Remove the Packaging
Take the Crystal Pro CP10K prefilled pods out of their packaging. Remove all protective materials before fitting the pod.
Check the pod carefully and make sure there are no cracks, leaks or damaged parts.
Step 2: Remove Protective Seals
Many prefilled pods have protective seals or covers to protect the pod before use. Check the mouthpiece and the base of the pod for any packaging material.
Before using the pod, make sure nothing is blocking the airflow or connection points.
Step 3: Check Pod Compatibility
Before installing the pod, check device compatibility. Crystal Pro pod compatibility is important because not every Crystal Pro pod is designed for every device.
The correct replacement pod should fit the Crystal Pro CP10K device without forcing it. Always use the correct replacement pod for the model you have.
Step 4: Prepare the Pod System
Some versions of the Crystal Pro CP10K pod system may include separate parts that need to be connected as instructed. Make sure all parts fit properly and follow the manufacturer's guidance for your specific version.
Check for proper alignment before continuing. The pod system components should sit together securely.
Step 5: Insert the Pod Correctly
To insert the pod correctly, line it up with the pod compartment on the device.
Gently place the pod into position. Do not twist, bend or force it. A correct pod installation should create a secure pod fit.
Check that the pod is sitting straight and fully connected. Correct pod placement is important for a good device connection.
Step 6: Check the Pod Connection
Once the pod is fitted, make sure the pod is secure. The pod should not sit loosely or move around more than expected.
A secure pod fit helps the device make proper contact with the replacement pod. If the pod looks uneven, remove it and check the pod alignment again.
Step 7: Allow the Pod to Settle
After a new pod is installed, follow the product instructions about how long to wait before use. This can help the pod and its internal parts settle correctly.
Do not rush the first use. If your specific product instructions recommend waiting, follow that guidance.
Step 8: Start Using the Device
Once the Crystal Pro CP10K pod setup is complete, use the device according to the manufacturer's instructions. Some pod systems are draw-activated, meaning the device activates when you inhale.
Take normal, gentle draws rather than pulling too hard.
This is the correct way to use Crystal Pro CP10K pods and helps you check that the pod has been fitted properly.
Crystal Pro CP10K Pod Setup Guide
For a quick CP10K pod setup, follow this simple order:
-
Remove the packaging.
-
Inspect the pod before use.
-
Remove protective seals.
-
Check device compatibility.
-
Prepare and connect the required pod parts.
-
Check for proper alignment.
-
Insert the pod correctly.
-
Make sure the pod is secure.
-
Follow the product instructions before first use.
-
Check that the device and pod are working correctly.
These Crystal Pro CP10K pods instructions can also be useful if you are changing a pod for the first time.
How to Install Crystal Pro CP10K Pods Correctly
Learning how to install Crystal Pro CP10K pods is mainly about correct pod placement and alignment.
Hold the pod carefully and position it above the pod compartment. Insert it straight into the device and allow it to sit naturally in place.
Do not use too much force. A compatible pod should fit correctly when it is properly aligned.
After installation, check:
-
Is the pod sitting straight?
-
Is there a secure pod fit?
-
Are the connection points clean?
-
Has all packaging been removed?
-
Is the pod designed for this device?
These simple checks can help avoid many common CP10K pod installation problems.
How Do I Know if a CP10K Pod Is Fitted Correctly?
A correctly fitted pod should sit securely inside the device.
You should check for:
-
Proper pod alignment.
-
A stable pod attachment.
-
A clean connection area.
-
No remaining protective seals.
-
No obvious gaps caused by incorrect placement.
-
Correct device compatibility.
If the pod feels loose or does not connect properly, remove it carefully. Check the connection points and try again without forcing it.
How to Replace Crystal Pro CP10K Pods
Over time, you may need to change your existing pod. Knowing how to replace Crystal Pro CP10K pods correctly is important for keeping the pod system working properly.
Step 1: Remove the Old Pod
Carefully remove the old replacement pod from the device. Pull it out gently and avoid twisting or forcing it.
Step 2: Check the Pod Compartment
Before fitting a new pod, check the pod compartment for dust, condensation or other debris.
Keep the connection area clean using a dry, soft cloth if needed. Do not use water inside the device.
Step 3: Prepare the New Pod
Remove the new Crystal Pro CP10K replacement pods from the packaging.
Inspect the pod before use and remove any protective seals or covers.
Step 4: Connect the Replacement Pod
Line up the new pod correctly with the device. Gently connect the replacement pod and make sure all parts fit properly.
Step 5: Check the Fit
After the pod replacement process, check that the new pod sits securely.
If everything is aligned correctly, follow the product instructions before using the device.
This Crystal Pro CP10K pod replacement guide can also help if you are learning how to change Crystal Pro CP10K pods for the first time.
When Should CP10K Pods Be Replaced?
You should replace the pod when required rather than continuing to use a pod that is no longer working properly.
Common signs may include:
-
Flavour becoming weaker or unusual.
-
Reduced vapour production.
-
A persistent burnt taste.
-
A damaged pod.
-
Leakage that does not stop.
-
The pod no longer connecting correctly.
How often should CP10K pods be replaced? There is no single answer because use can vary. Replace the pod when it has reached the end of its intended use or when the product instructions recommend replacement.
Crystal Pro CP10K Pod Compatibility
One of the most important parts of using replacement pods is checking compatibility.
Which pods fit the Crystal Pro CP10K? You should use pods specifically designed for the Crystal Pro CP10K pod system.
Crystal Pro pods from another model may look similar, but this does not mean they are compatible. Using the wrong pod can cause connection problems or poor performance.
Before buying or installing pod refills, check:
-
The exact device model.
-
The product name on the packaging.
-
Product compatibility information.
-
The manufacturer's guidance.
Crystal Pro CP10K compatible pods should be made for the correct device. Do not assume that all vape pods or replacement pods are universal.
Are Crystal Pro CP10K Pods Refillable?
Crystal Pro CP10K refill pods should not be confused with a traditional open refillable pod. Some pod systems use a prefilled pod design with a separate or integrated liquid supply as part of the complete replacement unit.
Do not attempt to refill or open a sealed pod unless the manufacturer's instructions clearly state that it is designed to be refilled.
Using the pod only as intended can help prevent leaks, damage and connection issues.
How to Maintain Crystal Pro CP10K Pods
Basic pod care can help you keep the device connection clean and avoid unnecessary problems.
Here are some simple pod maintenance tips:
Keep the Connection Area Clean
Check the pod connection area from time to time. Dust or condensation can affect the device connection.
Use a clean, dry cloth to wipe the area gently.
Handle the Pod Carefully
Avoid dropping or squeezing the pod. Handle the pod carefully when installing or removing it.
Store Replacement Pods Properly
Store replacement pods properly until you are ready to use them. Keep pods in suitable conditions and away from excessive heat or direct sunlight.
Check Before Fitting a New Pod
Before each pod replacement, inspect the pod for damage and check that it is the correct model.
Good pod care is simple and can help keep the pod system components in better condition.
Why Is My CP10K Pod Not Working?
If you are asking, “Why is my CP10K pod not working?”, start with a few basic checks.
Check the Pod Connection
Remove the pod and check for dust, condensation or leftover packaging material around the contacts.
Keep the connection area clean and reinstall the pod carefully.
Check Pod Alignment
Make sure the pod is sitting straight. Incorrect pod alignment can affect the device connection.
Check Compatibility
Make sure you are using the correct replacement pod. Crystal Pro CP10K pod compatibility matters, so check that the pod is designed for your exact device.
Check for Damage
Inspect the pod before use. If the pod is cracked, leaking or damaged, do not continue using it.
Refit the Pod
Remove the pod carefully and insert it again. Make sure the pod is secure and correctly positioned.
If the problem continues, follow the manufacturer's guidance or contact the retailer or manufacturer for further support.
Why Is My Crystal Pro CP10K Pod Not Connecting?
A pod may fail to connect because of incorrect placement, dirt around the contacts, remaining protective material or a compatibility issue.
Try these steps:
-
Remove the pod.
-
Check the connection area.
-
Remove any remaining packaging.
-
Inspect the pod carefully.
-
Check for proper alignment.
-
Insert the pod correctly.
-
Make sure the pod is secure.
Do not force the pod into the device. If it still does not connect, check the official product instructions.
Common Mistakes to Avoid
When using Crystal Pro CP10K pod refills or replacement pods, avoid these common mistakes:
-
Do not force the pod into the pod compartment.
-
Do not use a pod without checking compatibility.
-
Do not leave protective seals in place.
-
Do not use a visibly damaged pod.
-
Do not ignore a loose pod fit.
-
Do not try to modify the pod system.
-
Do not use the wrong replacement pod.
-
Do not expose pods to unsuitable storage conditions.
-
Do not continue using a pod that is clearly damaged or leaking.
Following the correct pod instructions is usually the easiest way to avoid these issues.
Crystal Pro CP10K Pods User Guide: Quick Checklist
Before using a new pod, remember this simple checklist:
-
Remove the packaging.
-
Check the pod carefully.
-
Inspect the pod before use.
-
Remove protective seals.
-
Check device compatibility.
-
Use the correct replacement pod.
-
Check for proper alignment.
-
Insert the pod correctly.
-
Make sure the pod is secure.
-
Keep the connection area clean.
-
Follow the manufacturer's guidance.
-
Store replacement pods properly.
Frequently Asked Questions
How do Crystal Pro CP10K pods work?
Crystal Pro CP10K pods work as part of the compatible Crystal Pro CP10K pod system. The pod must be correctly installed and connected to the device before use. Always follow the instructions supplied with your specific product version.
How do I use Crystal Pro CP10K pods?
Remove the packaging and protective seals, check compatibility, prepare the pod as instructed and insert it correctly into the device. Make sure the pod is secure before use.
How do I install CP10K pods?
Check the pod alignment and gently insert the pod into the correct pod compartment. Do not force it. The pod should sit securely when installed correctly.
How do I change Crystal Pro CP10K pods?
Carefully remove the old pod, clean the connection area if needed, prepare the new replacement pod and insert it into the device correctly.
Can I replace Crystal Pro CP10K pods?
Yes, the system uses replacement pods designed for the compatible Crystal Pro CP10K device. Make sure you choose the correct pod replacement for your model.
Which pods fit the Crystal Pro CP10K?
Use pods specifically designed for the Crystal Pro CP10K device. Do not assume that other Crystal Pro pods or general compatible pods will fit.
How do I know if a CP10K pod is fitted correctly?
The pod should sit securely and straight in the device. Check for correct pod placement, proper alignment and a clean device connection.
How often should CP10K pods be replaced?
Replacement depends on use and the condition of the pod. Replace the pod when required and follow the product instructions for your specific version.
What should I check before using CP10K pods?
Check the pod for damage, remove packaging and seals, confirm device compatibility, inspect the connection area and make sure the pod is fitted correctly.
Final Thoughts
Crystal Pro CP10K Pods are simple to use when you follow the correct steps. The most important things are choosing the right compatible pod, removing all protective materials, checking the pod carefully and making sure it is fitted securely.
Whether you are following a Crystal Pro CP10K pod installation guide for the first time or replacing an old pod, take a moment to check the fit and connection. Correct setup, careful pod maintenance and using the right replacement pod can help you avoid many common issues.