Vape Maintenance in 2025: Keep Your Kit Performing Like New
Vaping in 2025 is about more than just choosing the right device, e-liquid, or coil; it’s also about maintaining your gear so it continues to deliver top-tier flavour, vapour production, and longevity. With the range of pods, mods, and accessories available today, it’s easy to find yourself juggling multiple components and e-liquids—each requiring a little TLC to run smoothly. Yet, many vapers neglect routine upkeep, resulting in diminished flavour, wasted coils, or even costly device failures.
In this comprehensive guide, we’ll explore the importance of vape maintenance, break down cleaning steps for different components, and show you how to avoid the most common pitfalls that can degrade your device’s performance. Whether you’ve just picked up a sleek starter kit or you’re rocking a high-wattage box mod, these tips will help keep your vape experience consistently satisfying all year long.
1. Why Vape Maintenance Matters
-
Optimised Flavour and Vapour
Dirty tanks and residue-clogged coils prevent e-liquid from vaporising efficiently, leading to muted notes and weaker clouds. Regular maintenance keeps your taste buds happy and your vapour production dense. -
Extended Hardware Lifespan
Vaping gear can be a substantial investment—particularly if you own multiple kits or advanced mods. Proper upkeep protects those investments by reducing the wear and tear that shortens device life. -
Avoidance of Costly Repairs
Minor build-up can morph into serious problems if ignored. Leaking tanks can cause e-liquid to seep into your device internals, while neglected batteries risk performance issues (or in extreme cases, potential hazards). -
Consistent Nicotine Delivery
When your coil and wicking remain clean, nicotine absorption into the vapour is more stable—so you don’t experience sudden spikes or drop-offs in satisfaction.
2. Essential Maintenance Tools
You don’t need an elaborate workshop, but having some basic supplies on hand will streamline your maintenance routine:
-
Microfibre Cloths
Ideal for wiping down mods, glass sections, and metal parts without leaving lint. -
Cotton Swabs
Perfect for reaching into small crevices—like pod contacts, battery contacts, or drip tips. -
Paper Towels
Absorbent and disposable, making them handy for quick wipe-downs and soaking up spills. -
Warm Water and Mild Dish Soap
Useful for cleaning tanks, glass tubes, or the main body of certain pods. -
Isopropyl Alcohol (90%+ Strength)
Helpful for sterilising metal sections or battery contacts, as long as you allow them to dry thoroughly before use.
(Note: If you’re dealing with rebuildable atomisers, you might also keep small tools like scissors, ceramic tweezers, and wire cutters. But for basic pre-built coil maintenance, the list above should cover your essentials.)
3. Battery Care: The Heart of Your Device
3.1 Internal Battery Devices
Many modern pod systems and smaller starter kits have integrated batteries that you charge via USB. To extend their life:
-
Avoid Frequent Overcharging
Unplug your device once it reaches full charge—rather than leaving it on overnight. While many kits include overcharge protection, it’s still good practice. -
Store in a Cool, Dry Place
Heat degrades battery chemistry over time. Keep your device away from direct sunlight and don’t leave it in a hot car for hours on end. -
Clean Charging Port
Lint and debris can clog micro-USB or USB-C ports, causing poor charging connections. Use a soft brush or compressed air (gently) to remove blockages.
3.2 External Battery Mods
Advanced mods often utilise 18650, 20700, or 21700 cells. Follow these guidelines for safety and longevity:
-
Invest in a Quality Charger
Rather than relying on your device’s USB port, a dedicated external charger helps ensure balanced charging across each cell, preserving their capacity. -
Check Battery Wraps
If you spot any tears, rewrap immediately to avoid short circuits. -
Rotate Your Batteries
Label pairs and rotate them in usage to keep wear consistent.
Devices like the SMOK Morph 2 Vape Kit often rely on dual external batteries for high wattage, so proper battery care is essential for stable performance at such power levels.
4. Cleaning Your Tank or Pod
4.1 Standard Tanks (Glass + Metal Components)
-
Disassemble Carefully
Unscrew the tank from the mod, remove the coil, and disassemble the glass tube and other removable parts (like airflow rings, if possible). -
Rinse with Warm Water
Warm water flushes away e-liquid residue. For stubborn gunk or sweetened juices, soak components in a bowl of warm water with a drop or two of mild dish soap. -
Dry Thoroughly
Use a paper towel or let them air-dry fully. Trapped moisture can cause spitting or flooding when you reassemble. -
Reassemble and Prime
Insert a new coil (or reused coil if it’s still good), add e-liquid to saturate the wick, and give the tank a few minutes before firing.
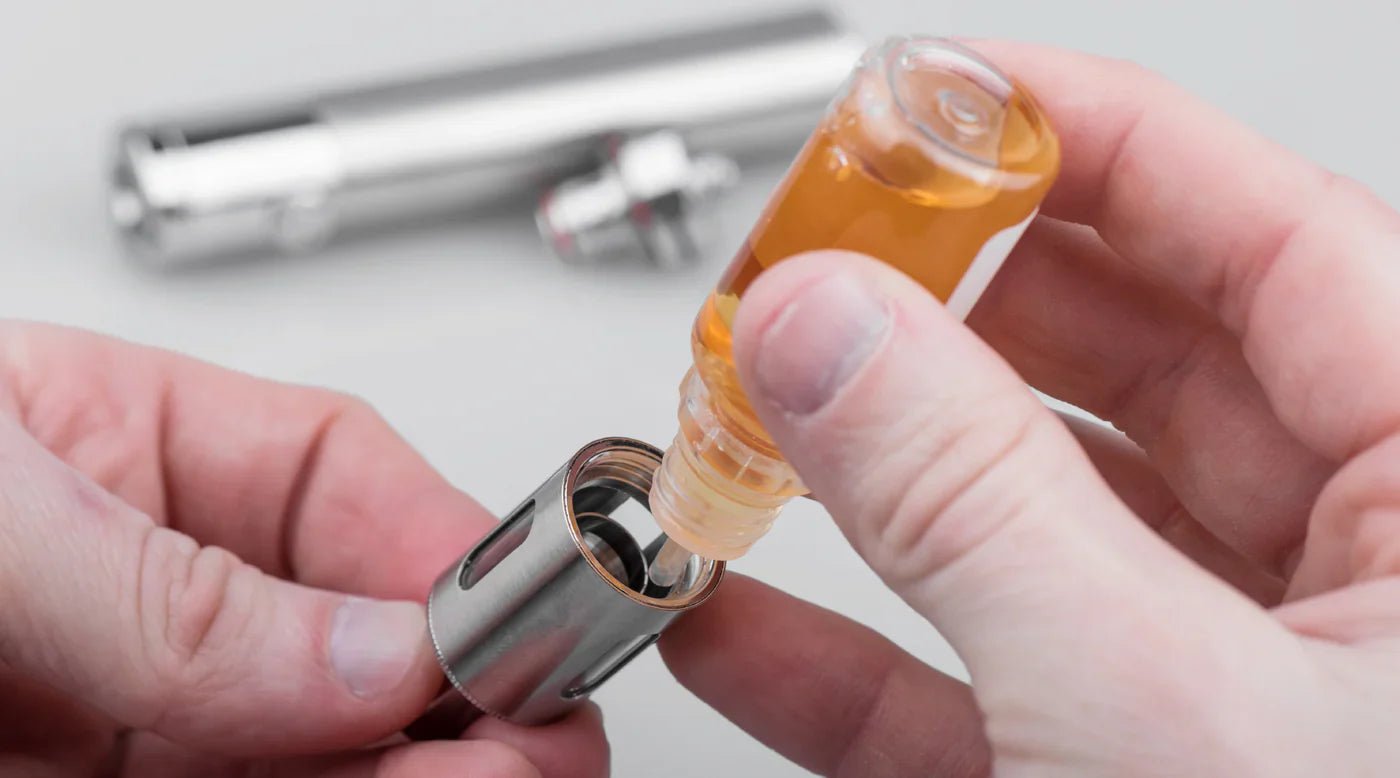
4.2 Refillable Pods
Refillable pods, like those you might find in a Hayati Refillable device, often have fixed coils or coil replacements inside a plastic or PCTG shell:
-
Remove the Coil, If Applicable
Some pod designs let you pop the coil out. Set it aside if it’s still usable. -
Rinse the Pod
Rinse gently under warm water. Avoid forcing water into the coil receptacle if you can’t remove the coil. -
Shake Out Excess Water
Turn the pod upside down and tap lightly on a paper towel. -
Air-Dry Completely
Any leftover moisture may dilute your e-liquid or cause misfiring.
Cleaning pods is slightly trickier due to the small fill ports and vent holes, but a gentle approach can revive them for multiple uses before the plastic deteriorates or the coil degrades.
5. Coils and Wicks: Maximising Lifespan
5.1 Priming a New Coil
Always prime a new coil—particularly with sub-ohm setups or when using sweet, high-VG e-liquids from the shortfills vape liquids range. Put a few drops of e-liquid onto the exposed cotton, then fill your tank or pod and let it sit for 5–10 minutes. This prevents dry hits and scorching the wick.
5.2 Light Cleaning vs Replacement
-
Light Cleaning
Some vapers rinse coils under warm water and let them dry to remove superficial residue, but results vary; it won’t truly restore a burnt coil. -
Full Replacement
Once you taste an unmistakable burnt flavour, coil replacement is usually the only remedy. Otherwise, you’ll compromise both taste and device safety.
5.3 E-Liquid Choice and Coil Lifespan
Sugary, dessert-style e-liquids often reduce coil longevity due to caramelisation. Rotating flavours—particularly ones with less sweetener—can help. Nic salts from the nic salts e-liquids collection might also be gentler on wicks, depending on brand and sweetener content.
6. Airflow and Drip Tips
6.1 Airflow Control
The airflow ring or slot on your tank can accumulate dust, lint, or spilled juice over time:
-
Regularly wipe the exterior with a cloth, focusing on the grooves.
-
Disassemble (if it’s removable) to flush out hidden e-liquid or debris.
6.2 Drip Tips (Mouthpieces)
Drip tips can harbour saliva, lip balm, or leftover condensation:
-
Remove the drip tip and rinse under warm water.
-
Soak it in a small dish of soapy water if it’s particularly grimy.
-
Air-Dry thoroughly.
Periodically cleaning your drip tip not only ensures a more pleasant mouthfeel but also prevents bacterial build-up.
7. Avoiding Leaks and Condensation
Leaks often stem from oversights in routine care. Here’s how to minimise them:
-
Don’t Overfill
Leave a small air bubble at the top of your tank or pod to accommodate pressure changes. -
Check Seals and O-Rings
Damaged O-rings around the tank’s base or coil contact points are a major cause of persistent leaks. If worn, replace them with spare O-rings (often provided by the manufacturer). -
Store Upright
Whenever possible, keep your device upright in a bag or pocket. Horizontal storage can exacerbate leaks, especially if the airflow slots are at tank-level.
Condensation is another annoyance—particularly inside the pod chamber of certain devices. Regularly remove the pod, wipe the interior with a cotton swab or microfibre cloth, and let it dry if you spot any moisture.
8. Temperature and Storage Conditions
8.1 Optimal Temperatures
Excessive heat can degrade your e-liquid, battery performance, and device materials. Aim to store or use your device in moderate conditions, typically between 10°C and 25°C. If you’re out on a sweltering summer day, keep your vape in a shaded spot.
8.2 Travelling
When flying or driving long distances:
-
Empty or Partially Empty Tanks
Pressure changes in an airplane cabin can force e-liquid through the coil, causing leaks. -
Separate Batteries
For external-battery mods, store batteries in cases to avoid accidental contact with metal objects like keys or coins. -
Consider Disposable Options
If you’re wary of baggage handling or unfamiliar charging facilities, a temporary switch to an inexpensive disposable for short trips might be an option—but do so knowing it’s less cost-effective in the long term.
9. Device Firmware and Software Updates
Some advanced mods come with updatable firmware, enabling manufacturers to fine-tune wattage curves, add safety features, or fix performance bugs. If your kit offers this:
-
Visit the Manufacturer’s Website
Look for the latest firmware version. -
Follow Instructions Carefully
A misstep during the update can corrupt your device. Only use official software and recommended cables. -
Back Up or Note Your Settings
Firmware updates can reset custom wattage or temperature settings, so keep track.
10. Routine Maintenance Schedules
To avoid guesswork, develop a schedule tailored to your usage:
|
Maintenance Task |
Frequency |
|
Clean drip tip |
Weekly (or more if needed) |
|
Wipe mod exterior & contacts |
Weekly |
|
Rinse tank/pod |
Every 1–2 weeks (or flavour change) |
|
Coil replacement |
1–2 weeks (or burnt taste) |
|
Battery check (wraps/charge) |
Weekly |
|
Firmware update (if applicable) |
As needed (check monthly) |
Of course, these intervals are guidelines—adjust based on how heavily or lightly you vape.
11. Identifying Major Warning Signs
A bit of residue or a slight drop in flavour is normal. Major red flags that require immediate attention include:
-
Battery Overheating
Warmth under heavy use can be normal, but if your device becomes scalding to the touch, stop using it and inspect for damage. -
Significant Leaks
If e-liquid is pouring out around the coil or airflow ring, check O-rings, coil seating, or for cracks in the tank. -
Persistent Burnt Flavour
Changing the coil should fix it. If not, you might have an issue with the wattage setting, the coil’s recommended range, or coil brand quality. -
Random Auto-Firing
This suggests an internal electrical fault. Immediately remove batteries (if removable) and discontinue use until checked by a professional or replaced.
12. Upgrading vs Repairing
Even with perfect maintenance, hardware eventually succumbs to wear. Here’s how to decide if you should repair or upgrade:
-
Age of the Device
If you’ve been using the same mod for three or four years, it might lack modern features or efficient battery management. Upgrading to a refillable vapes kit with updated technology could save money long-term on coil usage and battery performance. -
Cost of Repairs
Certain replacement parts (like circuit boards) are pricey or hard to source. If they outweigh the cost of a new kit, upgrading is more sensible. -
Desire for Advanced Features
Temperature control, custom wattage curves, and leak-resistant designs may be absent in your older kit. A new device that addresses these can deliver a superior, more consistent vape experience, reducing frustration and wasted e-liquid.
13. Common Myths About Vape Maintenance
-
“I can skip coil priming with new pods.”
False. Even pods with built-in coils need time to saturate. -
“Soap is too harsh for metal tank parts.”
Gentle dish soap is usually fine, provided you rinse thoroughly to remove any residue or scent. -
“Storing e-liquid in the fridge extends shelf life.”
E-liquids prefer cool, dark cupboards, but refrigeration can thicken the VG and cause condensation once removed, so it’s not always beneficial. -
“I can fix all coil problems by turning up the wattage.”
This typically backfires, burning wicks faster. The correct coil for your wattage range is key.
14. When to Seek Professional Advice
Most vapers can handle routine upkeep—cleaning tanks, swapping coils, and so on. However, you might want a professional assessment if:
-
Your device stops turning on suddenly after a minor spill or unknown reason.
-
You suspect battery damage, such as a swollen cell or persistent battery errors.
-
Your firmware update fails, causing the mod to freeze or glitch.
If you have a local vape shop with an experienced staff, they can often troubleshoot on the spot or recommend replacement parts. Otherwise, many online retailers offer customer support sections where you can submit queries or arrange repairs (if the device is under warranty).
15. Bottom Line: A Little Care Goes a Long Way
In 2025, the diversity of vape devices means there’s something for everyone—discreet pods, robust box mods, or anything in between. But no matter which device or brand you lean toward, the core principle remains: consistent maintenance ensures a longer-lasting kit, better-tasting vapour, and fewer headaches along the way.
Key Takeaways
-
Battery Maintenance: Avoid extreme temperatures, overcharging, and keep contacts clean.
-
Tank/Pod Cleaning: Rinse with warm water, allow thorough drying, and replace worn O-rings or coils as needed.
-
Coil Priming: Never rush a new coil; saturate the wick to prevent burnt hits.
-
Check for Leaks: Maintain your seals and store devices upright to minimise spillage.
-
Regular Routines: Implement a simple weekly or bi-weekly schedule to stay on top of cleaning, coil checks, and device updates.
By following these steps, you’ll preserve the integrity of your e-liquids, keep your device functioning at peak performance, and save money that would otherwise go towards constant coil replacements or hasty new-device purchases. If you ever need more guidance or want to explore the latest in vaping technology, check out Advanced Vape Kits designed for long-term success. Maintenance might take a bit of effort, but the rewards—flavour, savings, and peace of mind—make it well worth your time.